Here is a brief summary of what we have accomplished so far:
- Part 1 - Generated the crypto material for the various participants.
- Part 2 - Generated the genesis block for the Orderer node and started ordering service (solo node).
- Part 3 - Generated the configuration transaction block to create a new channel.
The configuration transaction block that we have created needs to be submitted to the Orderer nodes and it should be signed. The default policy in Fabric is that it should be signed by an admin user of at least one participating organization.
Hyperledger Fabric uses gRPC for the various services offered by the participating entities (peers & orderer) and Google Protobuf for the messages exchanged on the wire. However instead of directly using gRPC, the Fabric project provides SDKs in various languages (at present NodeJS, Java and Golang) that not only wraps the gRPC related aspect but also provide many other required utilities and a framework that client applications can make use to transact in the network and communicate with peers and orderers.
In this post we are going to use the NodeJS SDK to sign the configuration transaction block and submit it to the orderer. As with any other nodejs based project, the SDK is released in form of a library/module on npm but note that it targets ES6 (ECMAScript 2015) and at present can only be run using nodejs.
I have created a companion project (hyperledger-fabric-example) on github where I use fabric-client module to write the example scripts and explain the usage of its API and achieve the objectives of this post. This sample project is written using Typescript.
If you are not familiar with Typescript I would recommend reading an open source book on it by Basarat Syed - https://basarat.gitbooks.io/typescript/content/docs/getting-started.html
The classes exposed by NodeJS SDK are really well documented (https://fabric-sdk-node.github.io/) however at this point of time there is no type declaration file that helps in providing the intelli-sense and type safety so as part of this example project I have also started to write the corresponding typescript declarations and would submit them to DefinitelyTyped in near future.
The SDK exposes classes for every concept/entity that we have discussed so far (for e.g. Peer, Orderer, Channel) and interfaces for performing crypto operations, membership services, state store etc along with at least one default implementation for them. However, the main class that is exposed at the root of the module is a class called Client with helper methods to create objects of most of other classes discussed earlier. As an example, it is not recommended to create an object of Channel directly but use the factory method provided by the Client class.
There is another important class called User which represents the signing identity for the transactions sent to various entities in the network. Again, like other classes you typically use a factory method to create the user object.
Before we could sign the channel configuration transaction we need to perform 3 operations -
- Set the CryptoSuite to be used by the Client.
- Set the StateStore where the Client would store the user context.
- Set the User context to be used for signing the transaction block.
I have wrapped these steps in src/client.ts that exposes a method called getClient().
export async function getClient(org: Organization): Promise<Client> {

  const client = new Client();

  console.log('Setting up the cryptoSuite ..');

  // ## Setup the cryptosuite (we are using the built in default s/w based implementation)
  const cryptoSuite = Client.newCryptoSuite();
  cryptoSuite.setCryptoKeyStore(Client.newCryptoKeyStore({
    path: `${KEY_STORE_PATH_ADMIN}-${org}`
  }));

  client.setCryptoSuite(cryptoSuite);

  console.log('Setting up the keyvalue store ..');

  // ## Setup the default keyvalue store where the state will be stored
  const store = await Client.newDefaultKeyValueStore({
    path: `${KEY_STORE_PATH_ADMIN}-${org}`
  });

  client.setStateStore(store);

  console.log('Creating the admin user context ..');

  const ORG_ADMIN_MSP = MSP_DIR[org];

  const privateKeyFile = fs.readdirSync(__dirname + '/../' + ORG_ADMIN_MSP + '/keystore')[0];

  // ###  GET THE NECESSRY KEY MATERIAL FOR THE ADMIN OF THE SPECIFIED ORG  ##
  const cryptoContentOrgAdmin: IIdentityFiles = {
    privateKey: ORG_ADMIN_MSP + '/keystore/' + privateKeyFile,
    signedCert: ORG_ADMIN_MSP + '/signcerts/Admin@' + org + '.ksachdeva-exp.com-cert.pem'
  };

  await client.createUser({
    username: `${org}-admin`,
    mspid: MSP_ID[org],
    cryptoContent: cryptoContentOrgAdmin
  });

  return client;
}
The function and comments in it should be sufficient but here are some important points to note:
- We have parameterized the function to accept the organization for which we are creating the client.
- We are using the default software based cryptosuite provided by the SDK.
- We are using the default File based KeyValue Store provided by the SDK for keeping the state.
- We are providing the identity of Admin of Organization (passed as argument) as the signing identity by providing the path to its public and private key pair.
- The createUser() method not only creates the User object but also sets it as the current user context. In other words, methods in Client object would use the User object to perform the signing.
Since the channel creation request is to be sent to the Orderer we also need an object for Orderer that contains the necessary configuration (e.g. URL to connect to). Again as mentioned earlier instead of directly instantiating it we would use the factory method provided by the Client class.
export async function getOrderer(client: Client): Promise<Orderer> {
  // build an orderer that will be used to connect to it
  const data = fs.readFileSync(path.join(__dirname, ORDERER_TLS_CAROOT_PATH));
  const orderer: Orderer = client.newOrderer(ORDERER_URL, {
    'pem': Buffer.from(data).toString(),
    'ssl-target-name-override': 'orderer.ksachdeva-exp.com'
  });

  return orderer;
}
Now that we have objects of Client and Orderer, it is time to extract the channel configuration from ksachdeva-exp-channel-1.tx, sign it, construct the channel creation request and send it to the Orderer. All these steps are shown in src/create-channel.ts script.
const CHANNEL_NAME = 'ksachdeva-exp-channel-1';
const CHANNEL_1_PATH = './../ksachdeva-exp-channel-1.tx';

async function main() {

  const org1Client = await getClient(Organization.ORG1);
  const orderer = await getOrderer(org1Client);

  // read in the envelope for the channel config raw bytes
  console.log('Reading the envelope from manually created channel transaction ..');
  const envelope = fs.readFileSync(path.join(__dirname, CHANNEL_1_PATH));

  // extract the configuration
  console.log('Extracting the channel configuration ..');
  const channelConfig = org1Client.extractChannelConfig(envelope);

  console.log('Signing the extracted channel configuration ..');
  const signature = org1Client.signChannelConfig(channelConfig);

  // prepare the request
  const channelRequest: IChannelRequest = {
    name: CHANNEL_NAME,
    config: channelConfig,
    signatures: [signature],
    orderer: orderer,
    txId: org1Client.newTransactionID()
  };

  console.log('Sending the request to create the channel ..');
  const response = await org1Client.createChannel(channelRequest);

  console.log(response);
}
Make sure that the docker container for orderer is running. If not you can use the npm script to start it
# This is essentially calling the docker-compose. See package.json and its scripts section
npm run start-orderer
You can then run src/create-channel.ts by using npm as follows:
# This is essentially calling the ts-node. See package.json and its scripts section
npm run create-channel
A successful execution of the script should result in following output
$ npm run create-channel

> hyperledger-fabric-example@0.1.0 create-channel /Users/ksachdeva/Desktop/Dev/exp/hyperledger/hyperledger-fabric-example
> ts-node src/create-channel

Setting up the cryptoSuite ..
Setting up the keyvalue store ..
Creating the admin user context ..
Reading the envelope from manually created channel transaction ..
Extracting the channel configuration ..
Signing the extracted channel configuration ..
Sending the request to create the channel ..
status: 'SUCCESS'
Congratulations! we successfully created the channel. I have mapped the folder in the docker container for orderer that contains the ledger for channel configuration to the local file system. You should see a folder called ‘production’ and it sub contents as shown in the image below.
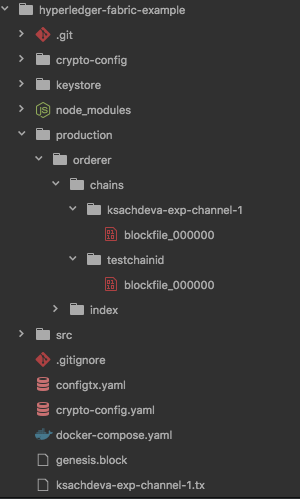
The production/orderer/chains/ksachdeva-exp-channel-1 is the new channel that we created. The production/orderer/chains/testchainid is the system channel that got created when we created the genesis block for orderer.
As you can guess that if you will run the src/create-channel.ts script again it should result in the failure. If you want to run the script few more times then you would want to issue following commands first
# Stop the orderer container(s)
npm run stop-orderer
# Start the orderer containers (s)
npm run start-orderer
In the npm run start-orderer script, I am first deleting the production folder so that the orderer container starts cleanly i.e. with out ksachdeva-exp-channel-1 channel.